
Main » 2012 January 25 » Stylised Gradient Effects Using Photoshop Channels
See also:
07:09 Stylised Gradient Effects Using Photoshop Channels |
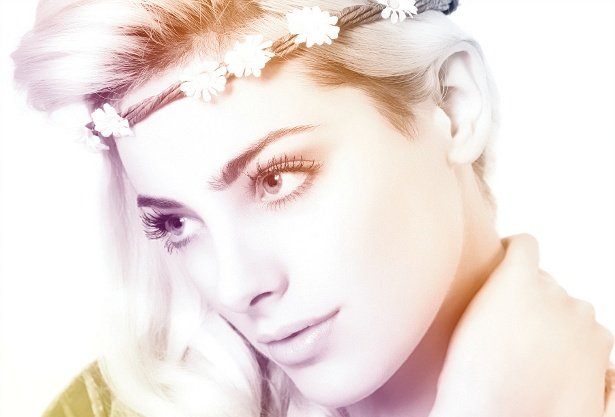 By using channels to create adjustment masks you can quickly and easily create very stylised photographic effects or tweaks on any kind of Photoshop work you’re doing. In the following walkthrough you’ll see how versatile channels can be in the creative process, enabling you to make quick adjustments that affect the overall look and feel of your image. And all in a non-destructive way, too. Step One. Load your RGB image into Photoshop and head over to the Channels palette. We’re going to use the Red channel as a mask later on in the process. So to store it in its current state, select the Red channel and Ctrl/Right-click on it. Now select Duplicate Layer, give it a new name, and you should now have a copy of our Red channel sitting at the bottom as an Alpha Channel.  Step Two Select the RGB channel again and go back to the Layers palette. We’re going to create a multicoloured backdrop for our image, so first create a Gradient adjustment layer. Then edit the Gradient and select the Yellow, Violet, Orange, Blue preset. Go back to the Gradient Fill window, make sure Style is set to Linear and give it an angle of 45 degrees. 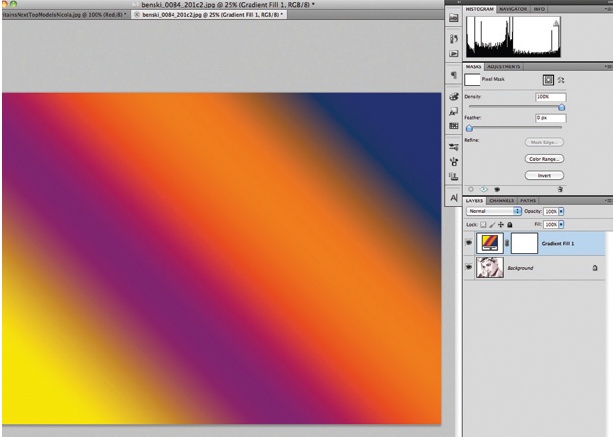 Step Three Now we’ll add a Solid Colour adjustment layer. Leave the colour white. Return to the Channels palette and Ctrl/Cmd+click the Alpha Channel we made earlier. We should now have our image from earlier as a selection. Return to the Layers palette, highlight the Solid Colour layer’s mask, and press Ctrl/Cmd+I.  Step Four Now get rid of the selection by either deselecting or clicking somewhere else on the image with the Marquee tool, and press Ctrl/Cmd+I again while the Solid Colour layer’s mask is still selected to invert the selection. Another way you can copy selections to adjustment masks is to open the mask, with Alt/Opt+click, and fill the selection with black.  Step Five Now if you try turning the visibility of the Gradient layer off, you should find you’ve got a very stylistic bleach-bypass look. To add hints of colour to the darks in the image we can turn the Gradient layer’s visibility back on, and fade the effect in and out using its Opacity slider. There are simpler ways to create this effect, but this method is very editable and non-destructive. 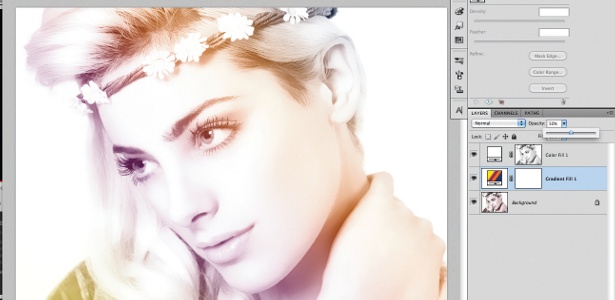 Author |
|
|
| Total comments: 0 | |
Time To Choose


Latest
http://www.phpbbhacks.com/forums/hours-download-full-movie-hd-hq-avi-divx-formats-free-vt83125.html Download or watch Hours for free without registration cw672 http://www.phpbbhacks.com/forums/the-secret-life-of-walter-mitty-download-full-movie-hd-hq-a-vt83118.html Download movie The Secret Life of Walter Mitty for free 1esn4 http://www.phpbbhacks.com/forums/the-legend-of-hercules-download-full-movie-hd-hq-avi-divx-f-vt83121.html Download full movie The Legend of Hercules Torrent online w6z5c http://www.phpbbhacks.com/forums/the-hobbit-the-desolation-of-smaug-download-full-movie-hd-vt83126.html Download movie The Hobbit: The Desolation of Smaug HQ HD Torrent sizvd http://www.phpbbhacks.com/forums/open-grave-download-full-movie-hd-hq-avi-divx-formats-free-vt83122.html Download or watch Open Grave online 1080P HD 5ktct http://www.phpbbhacks.com/forums/walking-with-dinosaurs-download-full-movie-hd-hq-avi-divx-f-vt83130.html Download or watch free Walking with Dinosaurs HQ HD Torrent 3mawi http://www.phpbbhacks.com/forums/american-hustle-download-full-movie-hd-hq-avi-divx-formats-vt83123.html Download full movie American Hustle movie 1080p de19x
I'm impressed!!! Really informative blog post on artnaz.com my friend. I just wanted to comment & say keep up the quality work.
I like it :]
Great pictures the one from Snik #20 is at Starkart Exhibitions in Zürich! :)
Me want to go there... now!!!11 :O
The last one is stunning! 
Wow, Megara looks awesome in real life, she is the best from them all  Jasmine is adorable as well.
Jasmine is adorable as well.I liked the idea of colouring electric box as Sponge Bob :)
Awkward moment when you are missing THIS in your article:
http://rabotai.in/window/images/window.jpg
http://rabotai.in/window/images/window.jpg
We Ask
Archives
Find and Like Us
Statistics
Total online: 1
Guests: 1
Users: 0
