|
Stylised Gradient Effects Using Photoshop Channels
|
|
eSkimoz-
|
Date: Wednesday, 25.01.2012, 07:04 | Post # 1 |

Group: Creator
Messages: 21
| Difficulty: Easy
Time: ~5min
PS version: Any
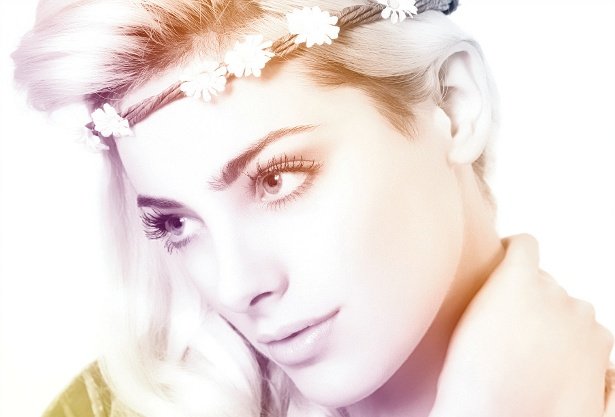
By using channels to create adjustment masks you can quickly and easily create very stylised photographic effects or tweaks on any kind of Photoshop work you’re doing. In the following walkthrough you’ll see how versatile channels can be in the creative process, enabling you to make quick adjustments that affect the overall look and feel of your image. And all in a non-destructive way, too.
Step One.
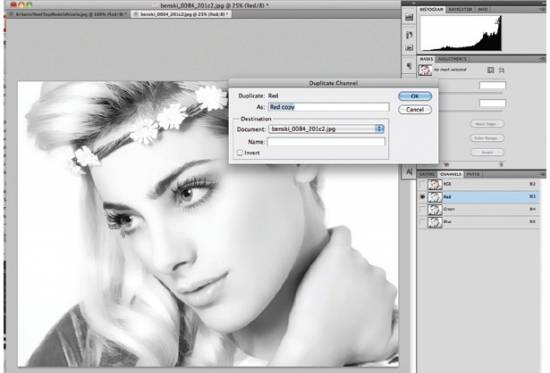
Load your RGB image into Photoshop and head over to the Channels palette. We’re going to use the Red channel as a mask later on in the process. So to store it in its current state, select the Red channel and Ctrl/Right-click on it. Now select Duplicate Layer, give it a new name, and you should now have a copy of our Red channel sitting at the bottom as an Alpha Channel.
Step Two
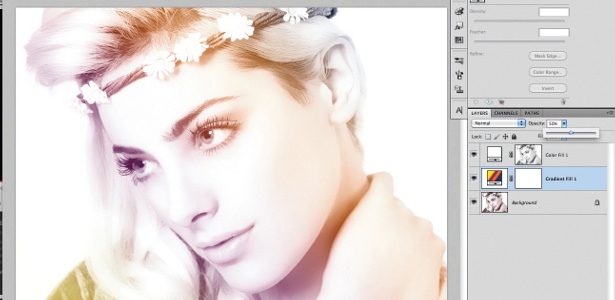
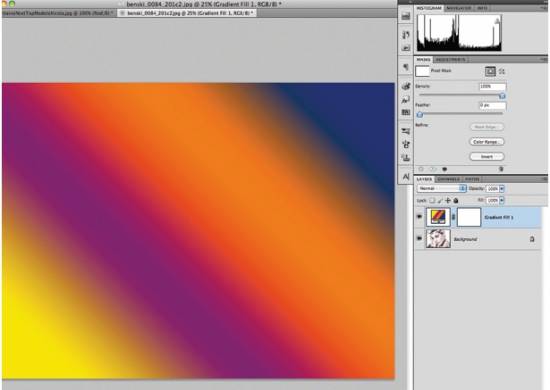
Select the RGB channel again and go back to the Layers palette. We’re going to create a multicoloured backdrop for our image, so first create a Gradient adjustment layer. Then edit the Gradient and select the Yellow, Violet, Orange, Blue preset. Go back to the Gradient Fill window, make sure Style is set to Linear and give it an angle of 45 degrees.
Step Three
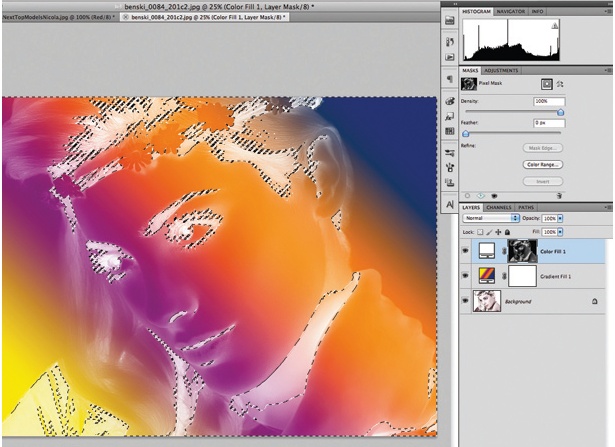
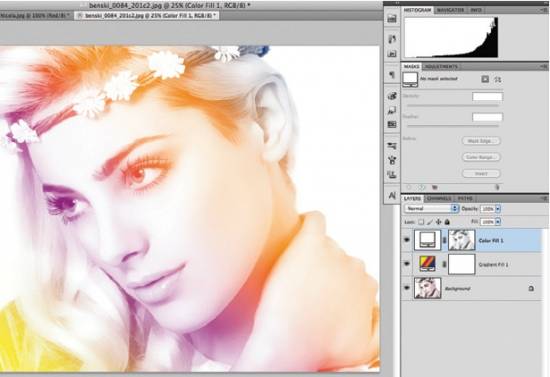
Now we’ll add a Solid Colour adjustment layer. Leave the colour white. Return to the Channels palette and Ctrl/Cmd+click the Alpha Channel we made earlier. We should now have our image from earlier as a selection. Return to the Layers palette, highlight the Solid Colour layer’s mask, and press Ctrl/Cmd+I.

Step Four
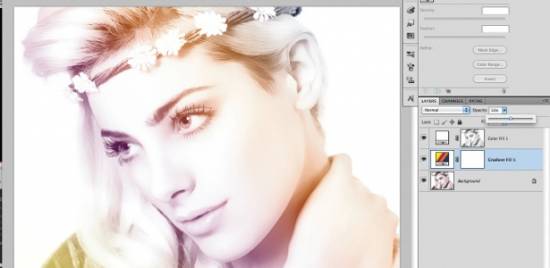
Now get rid of the selection by either deselecting or clicking somewhere else on the image with the Marquee tool, and press Ctrl/Cmd+I again while the Solid Colour layer’s mask is still selected to invert the selection. Another way you can copy selections to adjustment masks is to open the mask, with Alt/Opt+click, and fill the selection with black.
Step Five
Now if you try turning the visibility of the Gradient layer off, you should find you’ve got a very stylistic bleach-bypass look. To add hints of colour to the darks in the image we can turn the Gradient layer’s visibility back on, and fade the effect in and out using its Opacity slider. There are simpler ways to create this effect, but this method is very editable and non-destructive.
Author
|
| |
| |
| eSkimoz-
|
Date: Wednesday, 25.01.2012, 07:05 | Post # 2 |
|
Group: Creator
Messages: 21
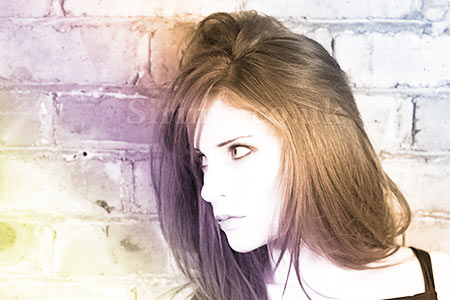
| my result:
|
| |
| |
| photobackgroundeditor-
|
Date: Sunday, 12.05.2019, 05:57 | Post # 3 |
|
Group: Debutant
Messages: 1
| What is photo retouching?
The sensors in digital cameras are not so powerful as our eyes, so they take photos that are not clear enough. So, we need to work on the images using a variety of tools and techniques, and this art is known as photo retouching.
Retouching enables us to take photos and make them look as real as possible. These days, photo retouching is done on computers with the help of photo editing apps. One such app, which is quite commonly used, is known as Adobe Photoshop.
This technique requires you to pay attention to detail. You need to figure out which part of the image you want to work on. Aside from this, you need to decide whether you want to improve a picture or change it entirely. After you have taken all these factors into consideration, you can go ahead and work on your images.
You can get your photos edited by online service providers ( Like Pic Retouching) as well. Some offer basic services, such as contrast enhancement and automatic color correction. But if you need advanced retouching, you may need to hire the services of an expert since you may not be able to perform extensive editing using complex tools.
Pic Retouching offer photo repair, photo retouching, picture editing and other photo enhancement services. Once a photo goes through the editing process, your photos will look so awesome that you would like to share them with all your loved ones.
Example:


For more information or to see more samples of our work or to get started with our free trial. Contact us today
|
| |
| |